Table of Contents
Blog - Countries - Drupal
Intro. Blog articles are crucial in building our thought leadership and to drive the right traffic to our website via social, SEO, newsletters,... Guidelines. Chose a topic which is relevant for your…

Intro
Blog articles are crucial in building our thought leadership and to drive the right traffic to our website via social, SEO, newsletters, ...
Guidelines
- Chose a topic which is relevant for your target group.
- Perform a keyword research
- Select a visual which is relevant to the topic
- Write a clear, descriptive and compelling title. The title will be the most important trigger for people to click on the article (in newsletters, social media, blog overview page …). People love lists like 'Top 7 of…', '5 reasons to ...', etc.
- The blog should start with a short introduction in order to introduce the topic. Keep it short in order no to lose the attention of the reader.
- Apply a clear structure using paragraphs and their titles to make your article scanable so visitors can read the essence in less than a minute (use bullet points, bold text, grey boxes, …)
- Limit the number of paragraph to maximum 10 in order not to lose the attention of the reader
- Do not hesitate to use quotes or images or graphs or tables to create some variations into the text. People don't only search for articles, but also for images, video, ....
- The blog should end with a call to action which should be hosted in an article content block.
- Add an author (especially if that author is known for his/her expertise)
Dimensions/Limitations/Specs
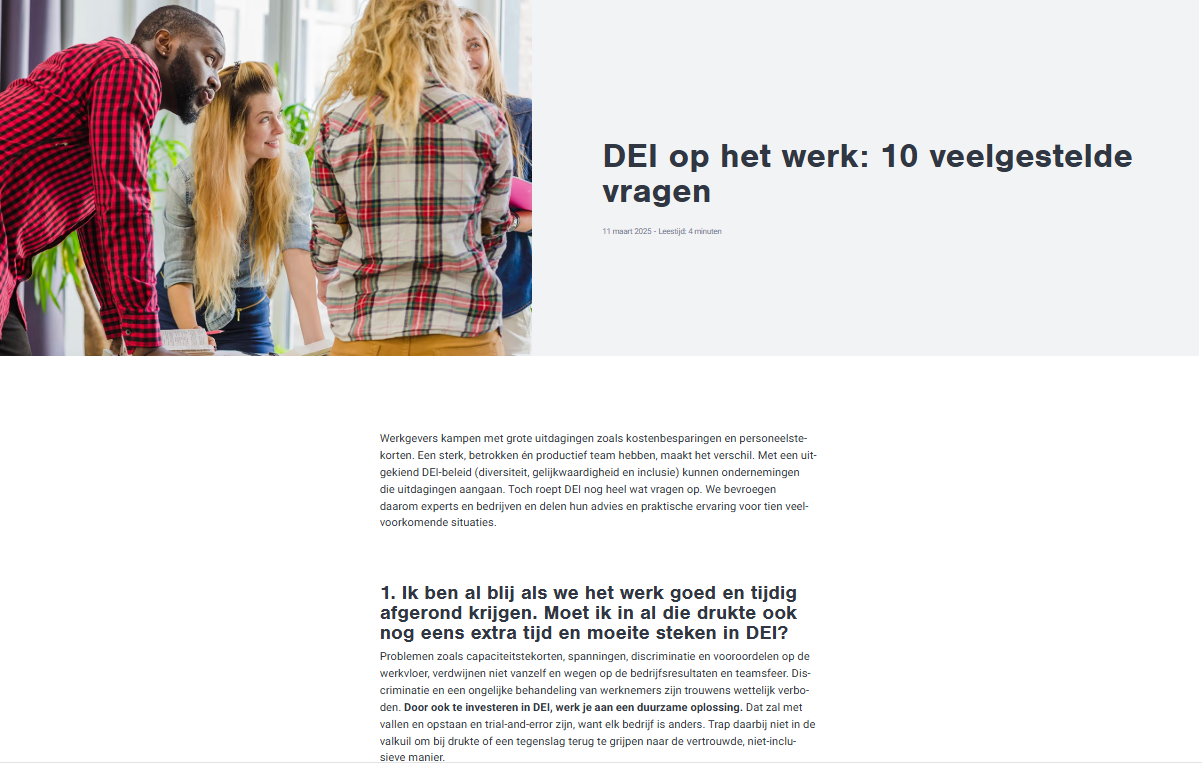
- Hero image/Search Image: 1200x800 - Please consult the visuals FAQ page for more infomation regarding copyrights
- Primary Pillar page needs to be selected and becomes automatically the parent of the page.
- Secondary pillar pages can be added
How to
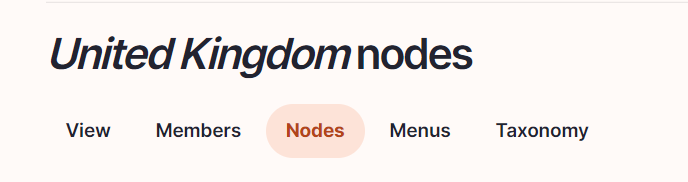
- Go to the following icon on the left side of your screen

- Select the country you want to work in and click on "nodes"
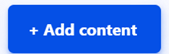
Click on “add content”
- Choose the content type blog article:

Language/Slug/Breadcrumb label
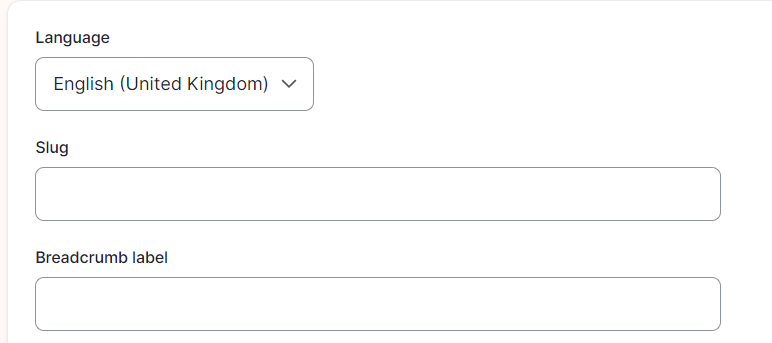
Language: Please select the language in which you want to create the blog
Slug: Please use this field if you want a custom URL (don't forget the - between the words). It will be filled automatically with date and the title if it hasn't been filled.
Breadcrumb label: Please use this field if you want a custom breadcrumb. It will be filled automatically with the page title if it hasn't been filled.
Content
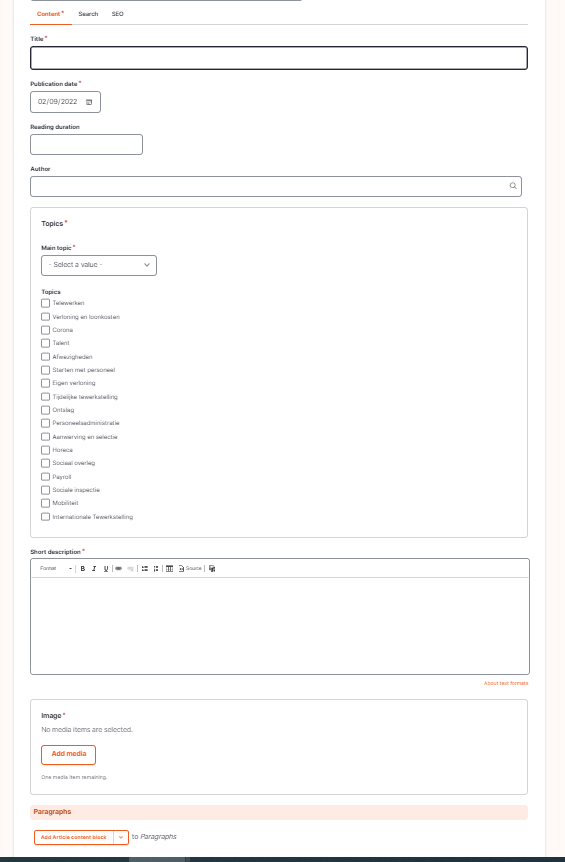

Title: To be filled with the title of the blog.
Publication date: Date you want to show on the blog post. Has no influence on the publishing of the post.
Reading duration: Add the duration you think it will take for the visitor to read the article
Author: Please select the author. For more information, please refer to the manual “how to create a person”
Topics
Main topic: Please select the "primary pillar page"
Topic: Add the topic of the "primary pillar page" but also other pillar pages the post could also be linked with.
Short description: This description will be showed in the blog block appearing on the pillar page and also other pages.
Image: Please refer to the dimensions/limitations/Specs section - Please consult the visuals FAQ page for more infomation regarding copyrights
Paragraphs
Then which paragraph to choose?
· If you need to add some paragraphs with a title and a text, please select “add text”
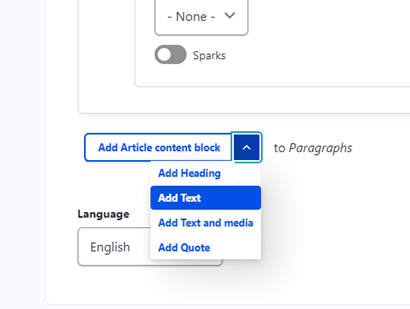
· If you need to add a separate title, please select “add heading”
· If you need to add visual or a video, please select “add text and media”
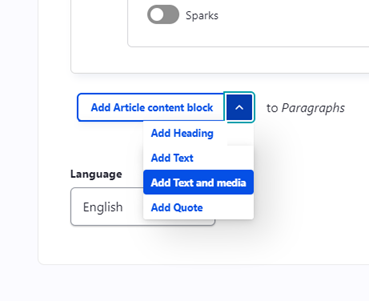
Title: Please add a title. Should always be a H3.
Media:
Picture: Please refer to the visual guidelines - Please consult the visuals FAQ page for more infomation regarding copyrights
Video: Youtube video
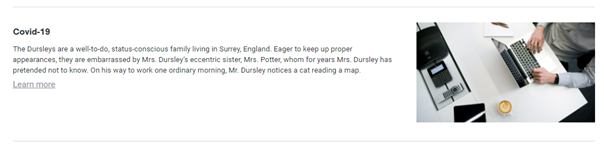
Text: Corresponds to the text appearing under the picture or video.
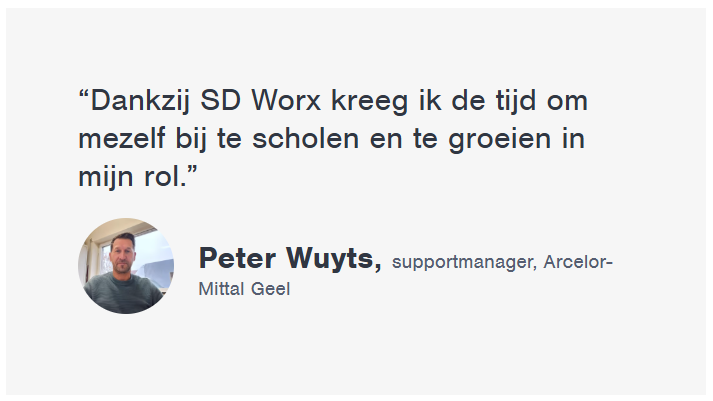
· If you need to add a quote, please select “add quote” using the following user manual
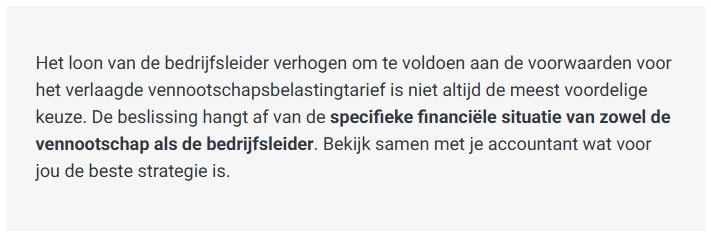
· If you need to highlight some information which is not linked to a person, please select a "Article Content Block" using the following user manual
Please always use a grey background for this.
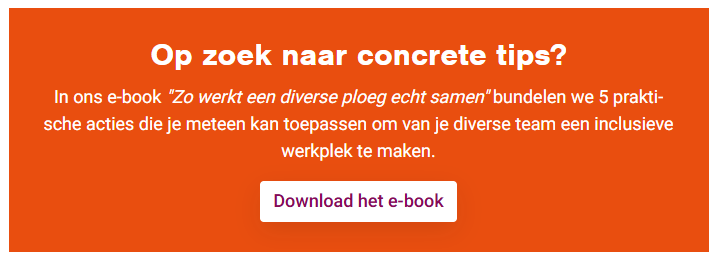
· If you need to add a call to action, but you don't have any picture, please select a "Article Content Block" using the following user manual
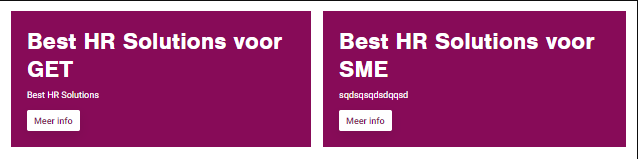
· If you need two calls to actions which will send to 2 different pages, please select "Add double Call to action" using the following user manual
Search
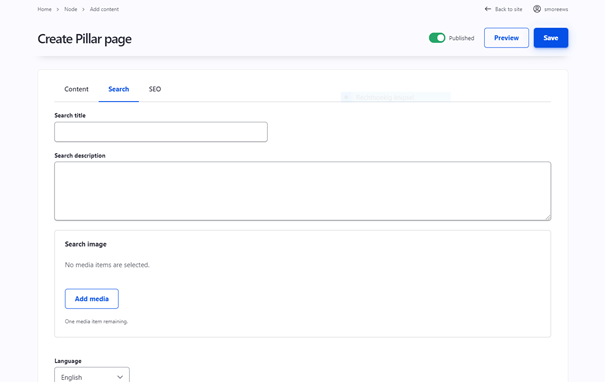
Search title: Use the blog post title
Search description: This is the text which appears in the search results of the website itself and in the search results of Google.
Search Image: Use the same image as for the blog post page itself
Click on “save”
How did we do?
Pillar page - Countries - Drupal
Publication Overview Page - Countries - Drupal