Step 6: Create Landing Page
Step 1: The basics and access Step 2: Create responded list Step 3: Create Registration form Step 4: Form completion action Step 5: Create Landing Page.. 1. Create a landing page on Pardot Lightning…

Updated
by Chandni Danhoo
1. Create a landing page on Pardot Lightning App
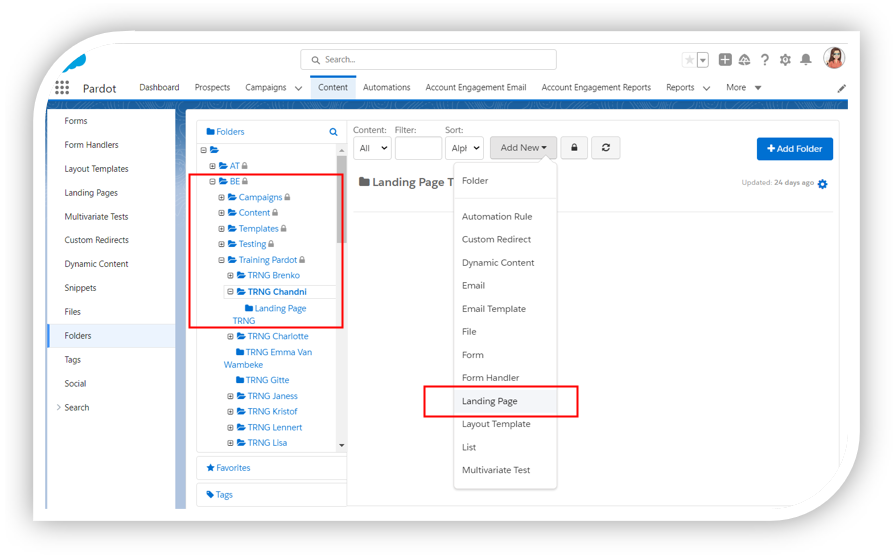
- Go to Pardot Lightning App Navigation > Content
- On the left side navigation, click on Folders and navigate to the folder where you want to create your LP
- In your folder > Click on Add New button > Landing Page
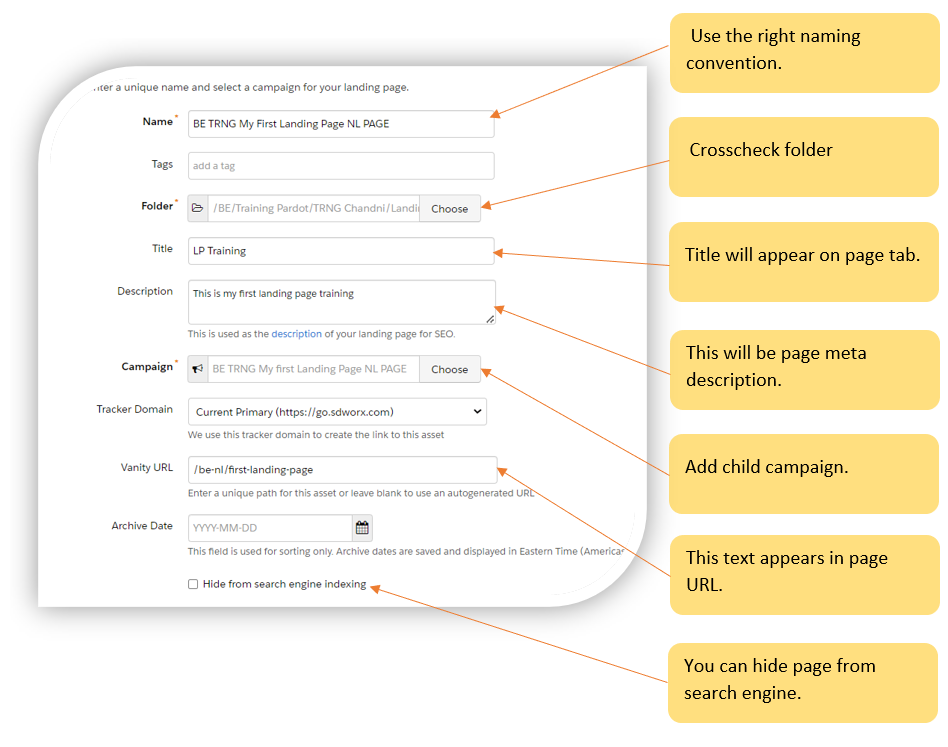
2. Add Landing Page basic details
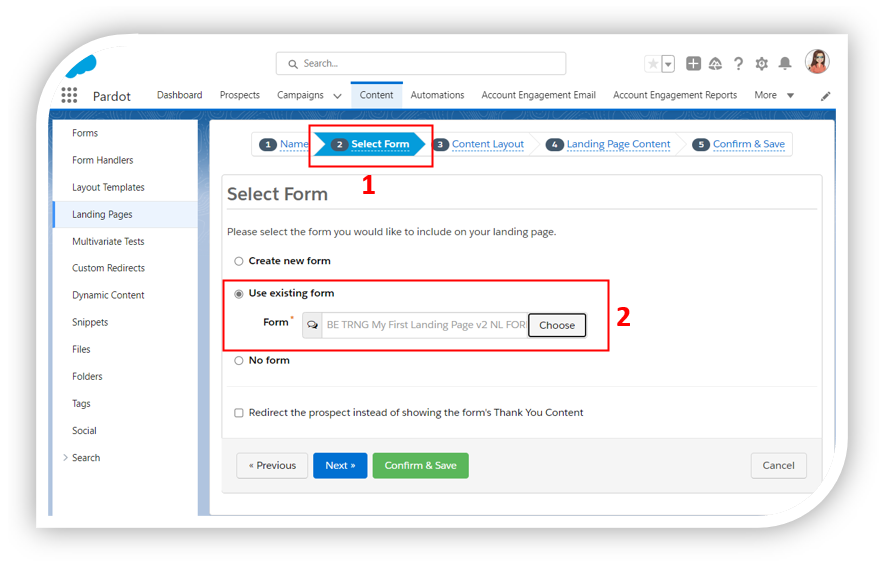
3. Add registration form to landing page
A landing page can be with a form or without a form. If you have created a form for your landing page,
- Go to the Select Form tab > Select "Use existing form"
- Add your form and click Next
4. Choose Page Content Layout
- Each country has it's own layout templates. In this scenario, we are using BE layout.
- Go to Content Layout tab > search <country code> TEMP Example (BE TEMP)
There are templates with different languages and layout (Basic/Advance/Iframe). Choose the right template depending on country, language and type of page.

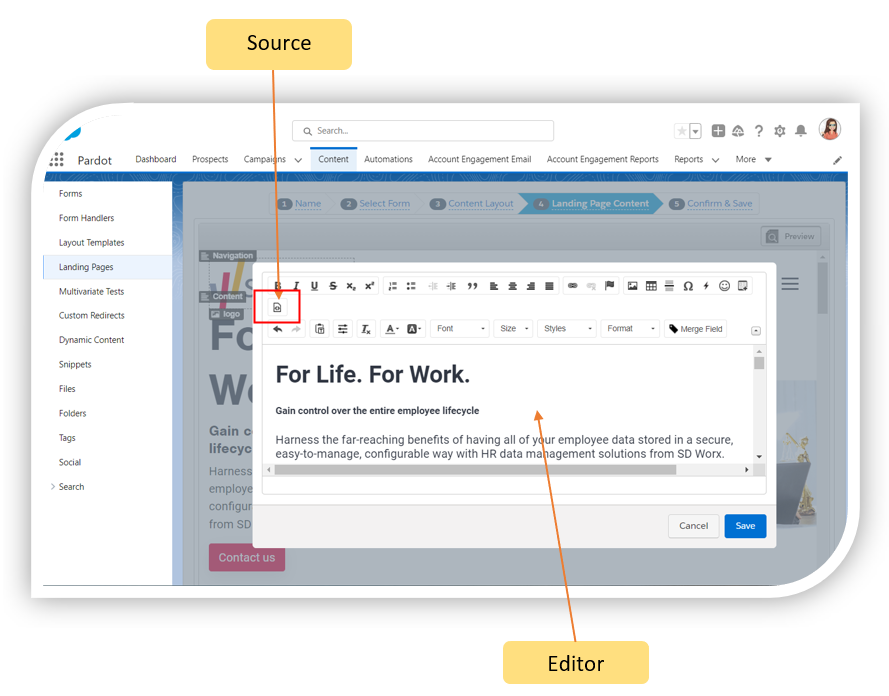
5. Add content to the landing page
In this training, we will use the Basic Template with only text and form as an example.
- Select your template > Go to Landing Page Content section
- You can add content via the editor or source code if you are familiar with HTML and Bootstrap framework.
- Click Next > Save and Confirm to complete
Note: StudioWorx Team (Digital Marketers) can help you to integrate your landing pages.
How did we do?
Step 5: Form Completion Action