Step 1 - Create an Event on InviteDesk
This article explains the first step of creating an event in InviteDesk, covering required permissions, how to start a new event, and how to complete the details in the Data tab—including naming conventions, event information, dates, and communication settings—before proceeding to the next setup step.

This guide walks you through the first step of creating an event in InviteDesk. You’ll learn what permissions you need, how to create a new event, and how to complete the four configuration tabs: Data, Information, Date & Location, and Communication. By the end of this step, your event structure will be ready for design, content, and communication setup.
Permission Required to Create an Event
To create an event, you must have Event Manager access in InviteDesk. As an event manager, you will have the permission to view / create / edit Events, Invitation lists, Tickets, Surveys, Public pages, Frontdesk, Address book, Reports, Mailing campaigns and Recipient lists. If you do not yet have this level of access, please reach out to Marketing Automation Team (Matthew Smet / Chandni Danhoo / Mario Medina). |
Step by Step - Create an event
Login to InviteDesk ➡️ Go to Events in the main navigation
Click on the “+” icon at the top-right corner. The event wizard will open and guide you through four tabs:
- Data
- Information
- Date and location
- Communication
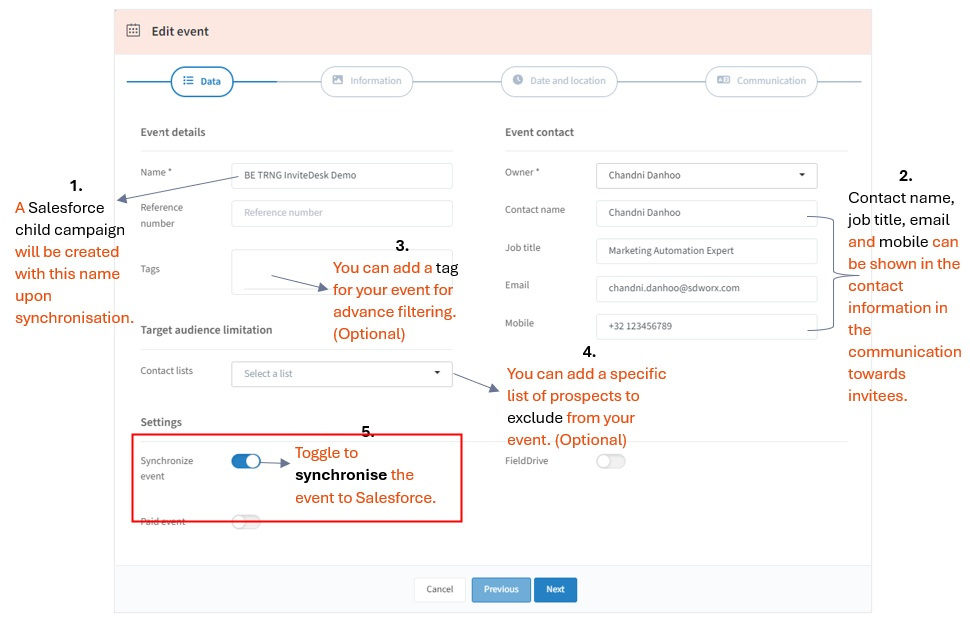
1. Data Tab
The Data tab contains your event’s most essential settings. These fields define the event internally, determine how it links to Salesforce, and provide the foundation for all later steps.
- Event Name: Enter a good and clear naming convention for example: BE 25CD016 Spark Event NL
Event name can be translated and adapted in the “Communication” tab if you want to add this information in your registration or emails.
- Event Contact Details: Owner, Contact name, Job title: This is the person displayed as the event owner/coordinator on emails, landing pages, and dashboards depending on the set up.
- Synchronize event: When enabled, InviteDesk syncs the event to Salesforce. Make sure to follow these guidelines before you synchronize your event.
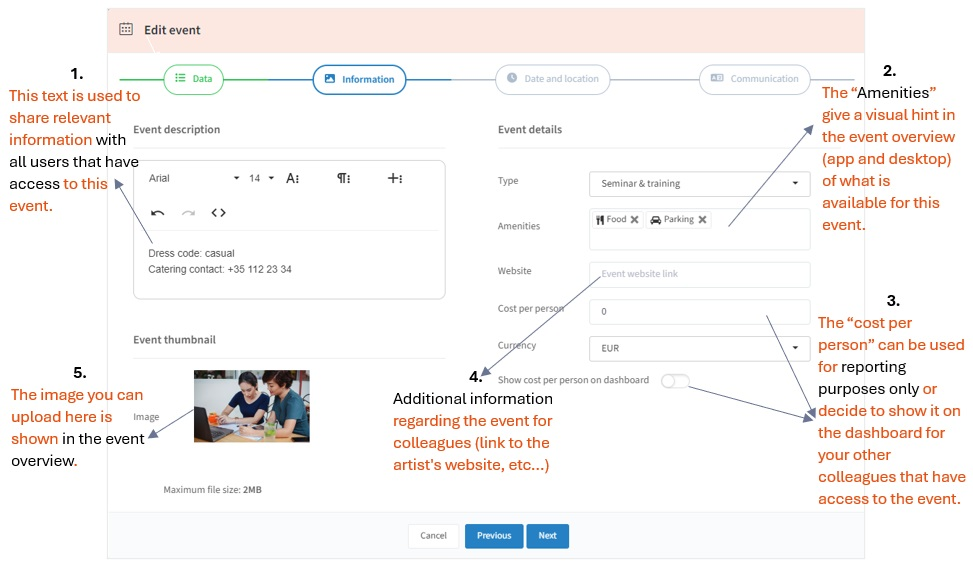
2. Information Tab
The Information tab contains descriptive content about your event. This information appears on the public event registration website.
- Event Description: Provide a high‑level overview of the event for internal.
- Image / Thumbnail: Upload an image that represents your event visually. This appears on the event dashboard or communications depending on your setup.
- Additional Info Fields (Type / Amenities / Website): You can display extra content or sections.
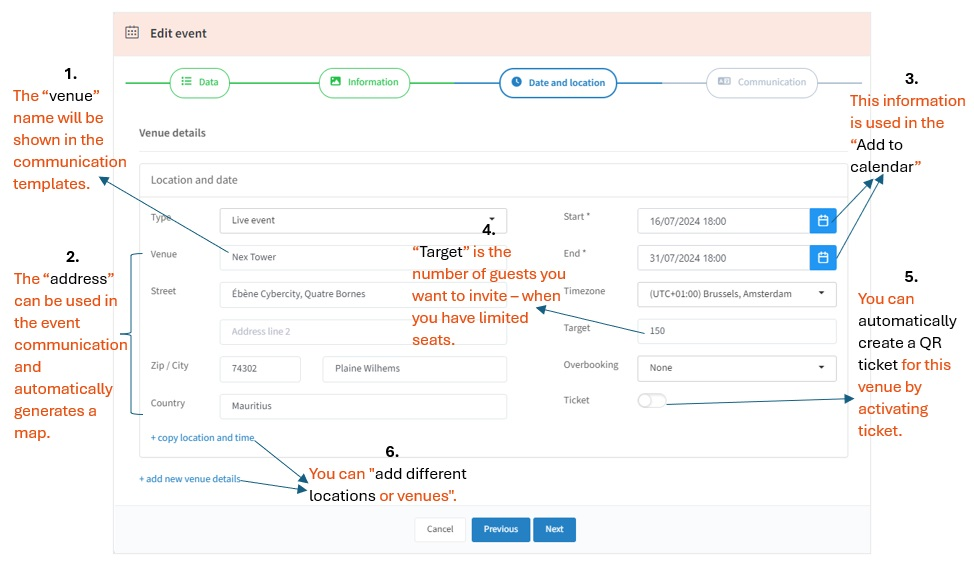
3. Date & Location Tab
The Date & Location tab defines the logistical details of your event — where it takes place, how long it runs, and how many participants you can accept.
- Type:
Live event – physical event (onsite),
Online event – webinar or virtual meeting: For online event, instead of the address fields, you can add a MS Teams URL leading to a webinar tool. The moment your guest clicks the "Join" button, he is immediately “checked in” on the attendee list. You will be able to send the URL of your webinar in your communication mailings. Your guests will see the button to join the webinar leading to the page on InviteDesk. On the landing page they will be able to access the link you have provided 15 minutes before the event starts.
- Event Address / Location: Venue, Street, Address line, City, Country
- Date & Time Settings: Start date is the date and time the event begins while End date is the date and time the event ends.
- Target: The maximum number of participants you aim to attract.
- Overbooking: Defines if registrations can exceed the target. None – no overbooking allowed.
- Ticket: Toggle this on if you want to configure paid or ticketed events. When enabled, additional ticketing options appear (pricing, categories, etc.).
3. Communication Tab
In the communication section, you can choose one or more languages for your event, and you can translate your event name and venue details if needed. Those details can be added in the registration form respectively.

Are you ready to proceed with the next step?
Checklist:
✅ Event data completed.
✅ Event information completed.
✅ Event Date and location completed.
✅ Event Communication language (s) selected / translated.
How did we do?
Step 2 – Communication & Design Set up