Event Type and Multiple Sessions
This guide explains how to create a session‑selection question in an InviteDesk registration form. It walks through adding a new question, configuring session options, enabling settings such as routing or timeslots, and adding descriptions, resulting in a dropdown where participants can choose their preferred session.

One event can have one session or different multiple sessions. On InviteDesk we have the flexibility to add multiple sessions in:
🔶Date & location tab when you create your event.
🔶Registration form as a normal field.
Based on your event requirements, choose which approach fits the best.
Scenario 1 – Add event session in the “Date & Location” tab
Edit your event ➡️ Go to “Date and location” tab
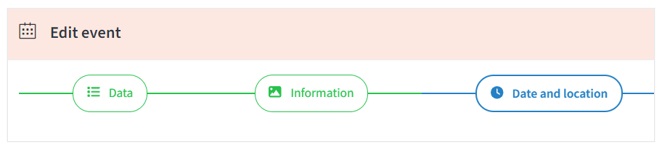
In Date and location tab, you can add:
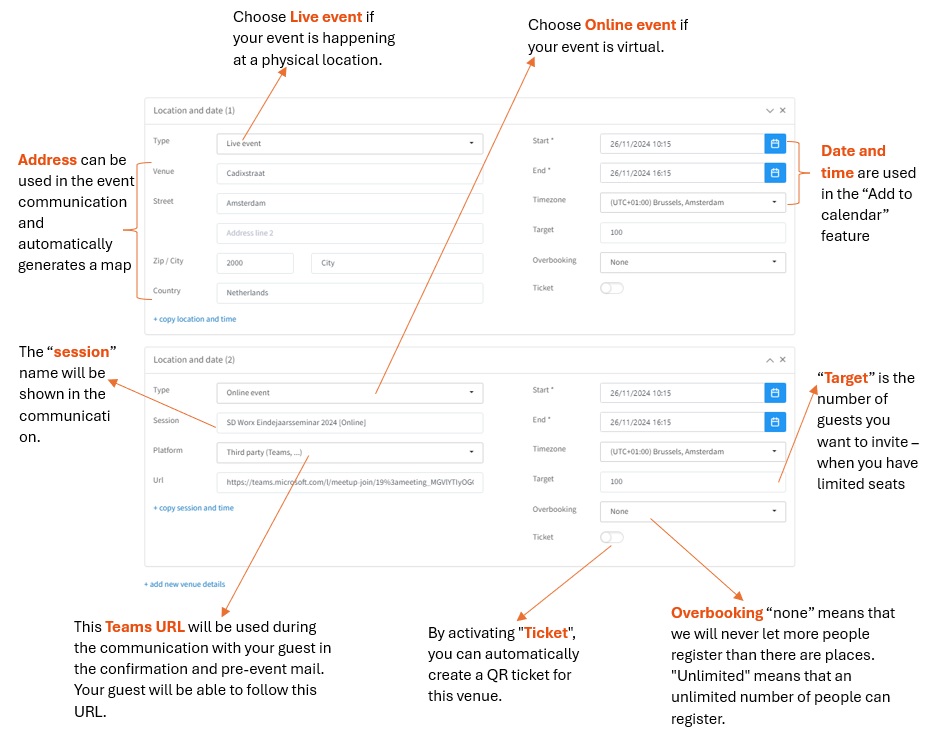
🟣 Both live (on location) and online sessions for a single event.
🟠 Multiple live sessions for a single event.
🟡 Multiple online sessions for a single event.
| Information Required | |
|---|---|
| Live Event | Online Event |
| ✔️ Venue ✔️ Street ✔️ Zip / City ✔️ Country ✔️ Start and End Day and Time ✔️ Time zone ✔️ Target |
✔️ Session name ✔️ Platform link – Teams ✔️ Start and End Day and Time ✔️ Time zone ✔️ Target ✔️ Teams meeting URL |
Example of Live Event and Online Event together:
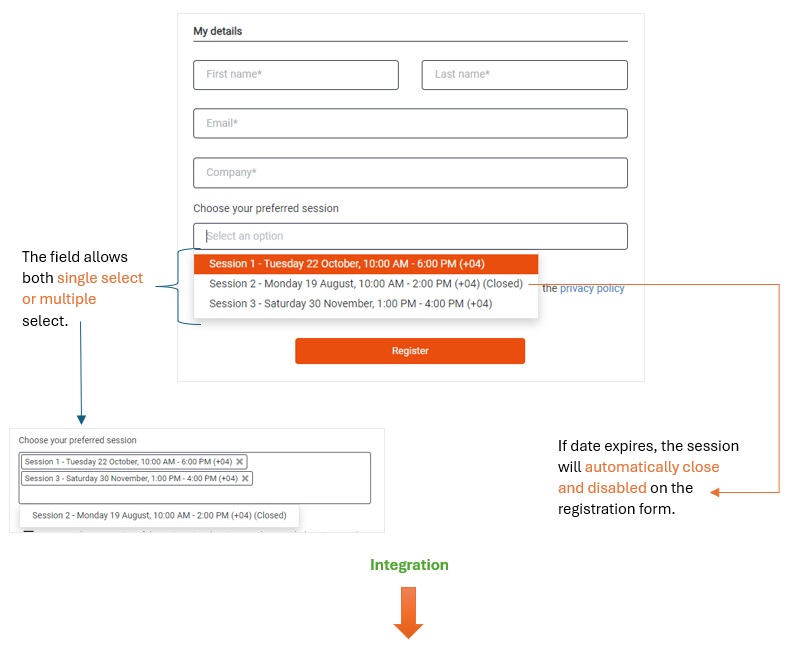
Scenario 2 – Add a normal field “Preferred session” with multiple options in a registration form.
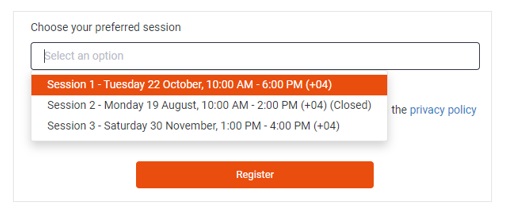
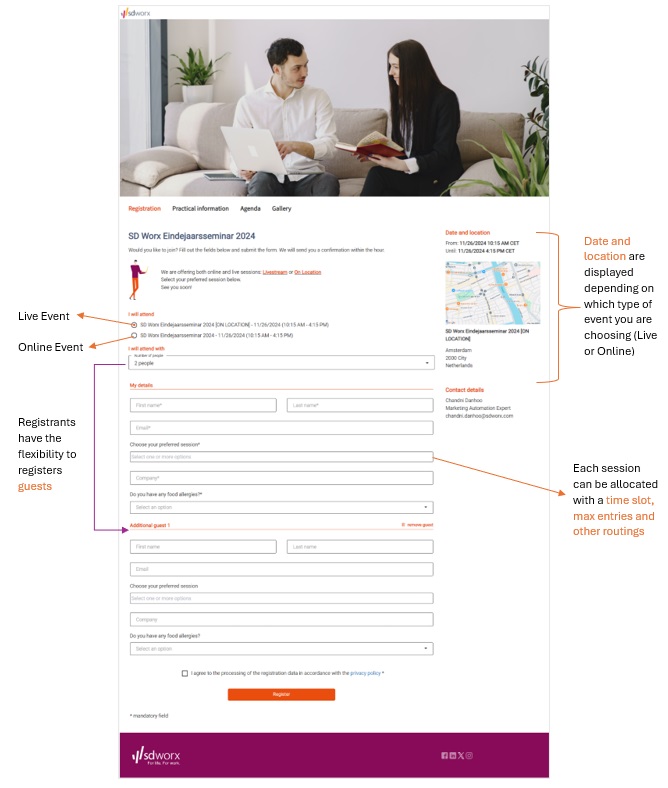
In the form below, we added a field where registrants can choose their preferred session which they would like to attend. Each session is allocated with a maximum entry and a different timeslot.
For each session, you can:
🔴 Add a maximum entry – You can add a maximum number of bookings for a specific session.
🟠 Add Timeslot – You can add a specific date and start & ending time for a specific session.
🟡 Routing – Based on selected session, you can display other fields.
🟣 Display style – You can select either dropdown option or button style to display the sessions.
🟢 E-ticket access rights – Different users can have access to specific sessions.
🟠 Type – You can select either single or multiple selections.
How to add a field with multiple sessions?
- Go to the registration form ➡️ Add a question ➡️ Single select / multiselect (optional)
- Click on the pencil icon ✏️ to add maximum entries, timeslots, style, routing and more.
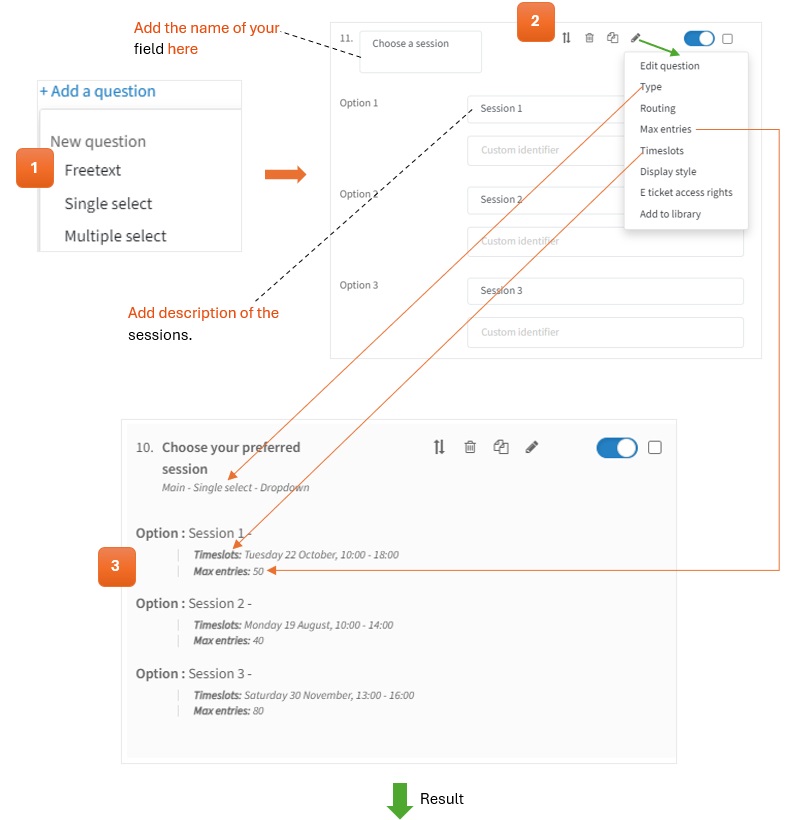
Example of a registration page with multisession with both Online and Live event.
How did we do?
Event Mails overview and target